Setting Up Multi-Level IVR for Professional Call Handling: A Practical Guide for Growing Businesses
Picture this: a customer calls your office, gets bounced between three different people, repeats their problem twice, and finally hangs up frustrated before anyone even understands what they needed. This happens more often than most business owners realize — and it’s almost always a call routing problem, not a people problem.
A well-designed multi-level IVR (Interactive Voice Response) system fixes exactly this. It greets callers instantly, understands their intent through simple menu choices, and routes them to the right department or agent without a human ever lifting a finger for the first thirty seconds of the call. Done right, it feels less like a robotic gatekeeper and more like a sharp receptionist who never gets tired, never takes a lunch break, and never forgets which extension belongs to accounts.
This guide walks through what multi-level IVR actually means, how to design one that doesn’t annoy callers, and the practical steps to get it running on your existing or new IP PBX setup.
What Exactly Is a Multi-Level IVR?
A single-level IVR is the classic “Press 1 for Sales, Press 2 for Support” menu. It works fine for very small setups, but the moment a business has more than two or three departments, callers start hearing long lists of options that don’t map cleanly to what they need.
A multi-level IVR solves this by nesting menus. The first layer handles broad categories — sales, support, billing, HR — and each of those branches into its own sub-menu. Someone who presses 2 for Support might then hear options for “existing ticket,” “new issue,” or “urgent escalation.” This keeps each menu short (ideally three to five options) while still covering a wide range of caller intents.
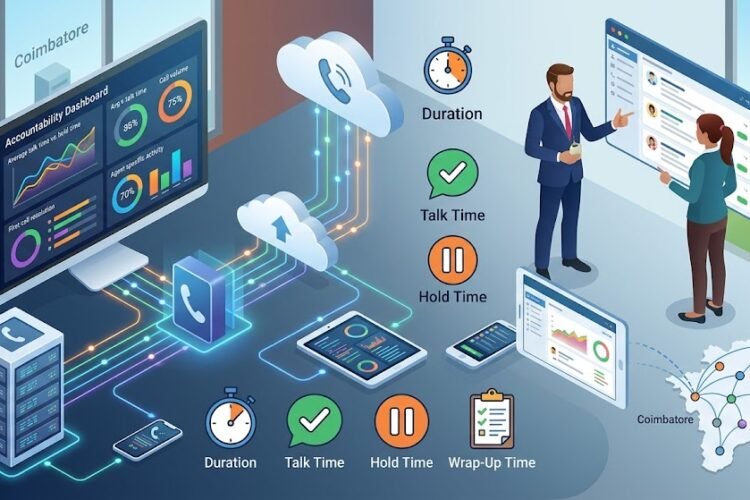
The difference between a single-level and multi-level system isn’t just structure. It directly affects how quickly a caller reaches the right person, which shows up in your call center metrics that matter — particularly first-call resolution and average handling time.
Why Call Routing Deserves More Attention Than It Gets
Most businesses treat their phone menu as an afterthought — something the vendor sets up once during installation and nobody touches again. That’s a missed opportunity. Your IVR is often the very first interaction a prospect or customer has with your company, before a human voice is even heard.
An IVR that’s confusing, too long, or routes people incorrectly creates friction before the conversation has even started. On the flip side, a thoughtfully mapped IVR:
- Cuts down misdirected calls and internal transfers
- Reduces average wait time by sending callers straight to the right skill group
- Frees up your front-desk staff from constantly asking “who are you trying to reach?”
- Gives you data on which departments get called most, so you can staff accordingly
If you’re already running a complete call center solution with an IP EPABX system, a properly structured IVR is what ties the whole experience together rather than leaving it as a collection of disconnected extensions.
Understanding IVR vs ACD Before You Build
Before jumping into IVR design, it’s worth understanding a distinction that trips up a lot of business owners: IVR and ACD are related but not the same thing.
IVR Handles the Conversation, ACD Handles the Traffic
The IVR is the voice menu — it talks to the caller and collects their input. The ACD (Automatic Call Distributor) is the traffic controller behind the scenes, deciding which specific agent or queue gets the call once the IVR has figured out the intent. A detailed breakdown of how these two systems work together is covered in our guide on ACD vs IVR and the backbone of modern call centers, which is worth reading if you’re planning a larger call center rollout alongside your IVR project.
Where Multi-Level Design Fits In
Multi-level IVR essentially controls how granular the ACD’s decision-making can be. A flat, single-level menu gives the ACD only broad categories to work with. A well-branched multi-level menu gives it much more precise intent data, which means calls land with the right skilled agent on the first attempt far more often.
Planning Your IVR Menu Structure
Good IVR design starts on paper, not in the phone system’s configuration panel. Rushing straight to setup is the most common reason IVR menus end up bloated and confusing within a few months of going live.
Map Out Real Caller Intents First
Before touching any settings, list out the actual reasons people call your business. Pull this from real data if you can — call logs, common complaints from your front desk, or notes from your sales team. Avoid guessing based on how your business is organized internally; callers think in terms of “I have a problem” or “I want to buy something,” not in terms of your org chart.
Keep Each Menu Level Short
Cognitive load matters here. Once a menu has more than five spoken options, callers start forgetting the earlier ones by the time they hear the last one. If you find yourself needing more than five options at any single level, that’s usually a sign you need another sub-menu rather than a longer list.
Always Include an Escape Route
Every single menu level should have a way to reach a live person, whether that’s pressing 0 or simply staying silent for a few seconds. Nothing frustrates a caller faster than being trapped in a maze of menus with no way out, especially if their issue doesn’t fit neatly into any of the categories offered.
Step-by-Step: Configuring Multi-Level IVR on Your IP PBX
Once the menu structure is planned, the technical setup itself is fairly straightforward on most modern IP PBX platforms.
Step 1: Record or Generate Clear Prompts
Your voice prompts should be short, calm, and specific. “For sales, press 1. For support, press 2” works better than a long-winded introduction before every option. If you don’t have a professional voice recording, many platforms support high-quality text-to-speech that sounds perfectly natural for this purpose.
Step 2: Build the Top-Level Menu
This is your main entry point — the first thing every caller hears. Keep it limited to broad categories only, and route each digit press to either a sub-menu or directly to a queue/extension if that category doesn’t need further branching.
Step 3: Configure Sub-Menus for Each Branch
Under each top-level option, build the next layer of choices. This is where you get specific — for example, under “Support,” you might separate technical issues from billing questions, each routed to a different team or queue.
Step 4: Connect Menus to Queues, Not Just Extensions
Routing directly to a single extension means calls go unanswered if that person is busy or away. Routing to a queue instead lets the call ring across a group of available agents, which is a core part of running effective voice over IP call center solutions in Coimbatore.
Step 5: Test With Real Users, Not Just Yourself
Have a few people outside your IT team call in and try to reach different departments. You’ll be surprised how often menu wording that seems obvious internally confuses someone hearing it for the first time.
Advanced Features Worth Adding Once the Basics Work
Once your core multi-level IVR is running smoothly, a few additional features can push it from “functional” to genuinely impressive.
Business Hours and After-Hours Routing
Your IVR can automatically detect the time of day and route calls differently outside business hours — perhaps to a voicemail box, an answering service, or an emergency on-call number — without any manual switching.
CRM-Aware Routing
More advanced setups tie the IVR directly into your CRM, so returning customers can be routed based on their account history rather than generic menu choices. This is where integrating your IP PBX with your CRM starts paying off, since the phone system can recognize a caller’s number and route them straight to their assigned account manager.
Call Recording for Quality and Training
Pairing your IVR with automatic call recording for customer support centers gives you a way to review how calls are actually being handled after the IVR hands them off, which is invaluable for training and dispute resolution.
Screen Pop for Agents
When a call reaches an agent, screen pop functionality can automatically display the caller’s details on the agent’s screen the moment the phone rings, based on the information gathered during the IVR interaction. This single feature often cuts several seconds off every single call, which adds up fast across hundreds of calls a day.
Common Mistakes That Undo a Good IVR
Even a carefully planned IVR can fail in practice if a few common pitfalls aren’t avoided.
Menus that are too deep are one of the biggest offenders — if a caller has to go through four or five layers before reaching a person, most will give up. Two to three levels deep is usually the practical ceiling for most small and mid-sized businesses.
Another frequent mistake is never revisiting the menu after launch. Business needs change, new departments get added, and old options become irrelevant, but the IVR often stays frozen in time. A quarterly review of your menu structure against actual call patterns keeps it useful.
Finally, businesses sometimes skip proper SIP trunking configuration underneath the IVR itself, leading to call quality issues that make even a perfectly designed menu sound choppy or unreliable to callers.
Bringing It All Together
A multi-level IVR isn’t about sounding “high-tech” for its own sake — it’s about respecting your callers’ time and making sure the right conversation happens with the right person, quickly. Combined with smart queue routing, CRM integration, and solid call recording, it transforms your phone system from a simple answering mechanism into a genuine front door for your business, one that reflects well on you before a single word is exchanged with a live agent.
If you’re planning a broader phone system upgrade alongside your IVR project, it’s worth reviewing our guide on high-performance call center infrastructure setup to make sure the underlying network and hardware can support everything you’re building on top of it.
Frequently Asked Questions
How many levels should a business IVR have?
Most businesses do best with two to three levels. Going beyond that usually causes more caller frustration than it saves in routing accuracy.
Can multi-level IVR work with an existing phone number?
Yes. Multi-level IVR is configured on your IP PBX or cloud telephony platform and works with your existing business number — no need to change or port anything.
Does setting up IVR require new hardware?
Not necessarily. Most modern IP PBX systems already support multi-level IVR through software configuration alone, though very old analog systems may need an upgrade first.
How long does it take to set up a multi-level IVR?
For a straightforward two or three-level menu, configuration typically takes a few hours once the call flow has been properly planned. Testing and refinement afterward may take a few additional days.
Can the IVR menu be changed later without technical help?
Most platforms offer a simple admin panel where menu options, routing, and recorded prompts can be updated without needing a technician, though initial setup is usually best handled by your service provider.